Simulation Window Tabs
 Tabs can be added directly to the simulation window, allowing for display of the simulation itself, dialogs, HTML pages, Custom Reports, and spreadsheets. You must first have created a dialog, Custom Report, or spreadsheet to enable this feature.
Find this feature on the Insert Tab of Simul8.
Creating the Tabs
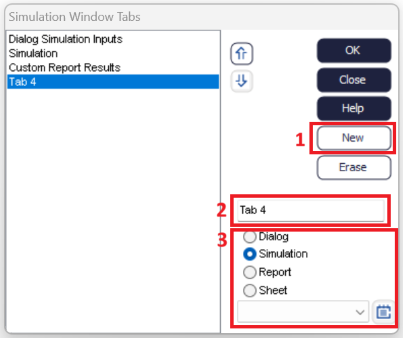
- Use the New button to add a new tab to the simulation.
- Enter the name of the tab to display in the text input field.
- Choose the radio button for the element to be displayed in this tab.
Dialog
If there are dialogs in the simulation, choose the Dialog radio button to display a dialog in the tab. Use the dropdown to choose the corresponding dialog to be displayed in the tab.
HTML Page
Dialogs can display HTML files. When creating a Dialog, there is now an option to display HTML Content. This allows for uploading an HTML file to be displayed in place of a standard Simul8 dialog.
If a dialog has been created to display HTML content, then choosing the Dialog radio button and choosing the corresponding HTML dialog from the dropdown will display an HTML page on the created tab.
Simulation
Choosing the Simulation radio button will display the main simulation window when the tab is active.
Report
If there are Custom Reports in the simulation, choose the Report radio button to display a Custom Report in the tab. Use the dropdown to choose the corresponding Custom Report to be displayed in the tab.
Spreadsheet
Use the Sheet area button to display a spreadsheet in the tab. The dropdown will populate with a list of all available spreadsheets in the simulation to choose to display.
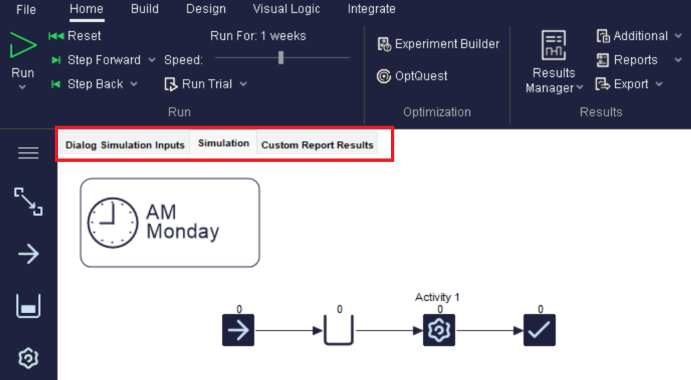
Using the Tabs
Once the tabs have been created, they will be accessible on the Simulation Window, at the top left of the window. Below is an example of a simulation that has three tabs created, where a user can click on each tab to access the relevant display.