R integration with Simul8
The R integration with Simul8 allows you to export data to R and run scripts directly from Simul8. This help file assumes that R is already installed on your machine.
Getting started with the R integration
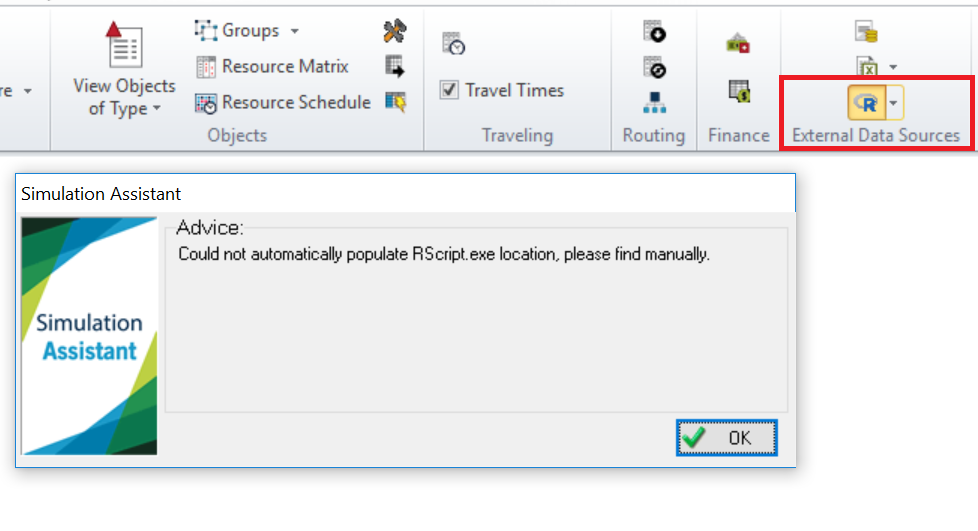
First, go into the Integrate tab. In the External Data Source section on the top ribbon, click the “R Scripts” button (just below the “Excel Connections” option).
If you have R installed in your Program Files, Simul8 will automatically detect the RScript.exe. In that case, you have now set up the Simul8 to R connection and are ready to choose the specific R script where the simulation result(s) should export (see next step on how to choose your R script).
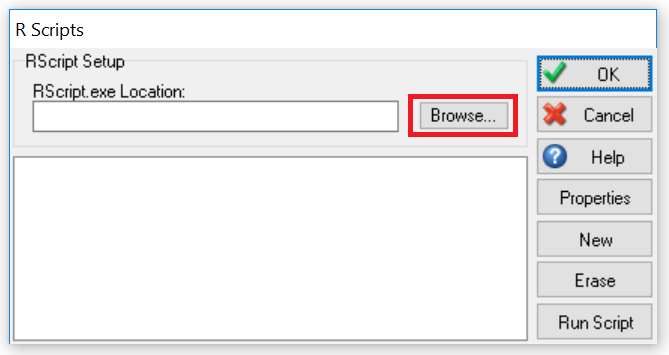
If Simul8 cannot detect the RScript.exe automatically, you will see a dialog saying that the connection needs to be added manually. To do that, just click “OK” on the dialog and the window to set up a connection will automatically pop up. Click “Browse” (see screenshot) and point to the location where R is installed. Then, choose Rscript.exe and now the connection from Simul8 to R is set up.


Setting up the Script Properties and selecting which R script to use
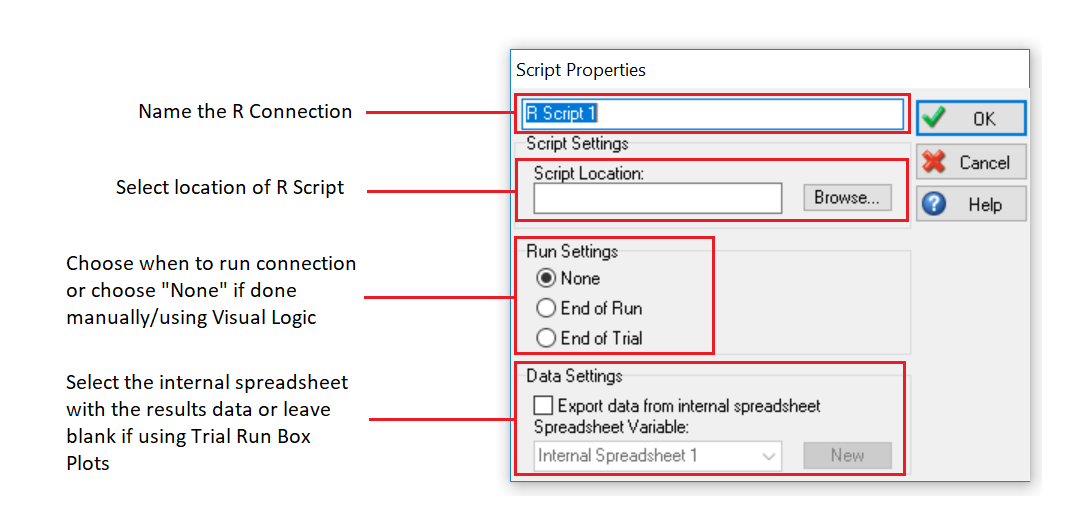
Once Simul8 knows the location of R on your machine (done in the previous step), you need to choose the specific R file where you want to export your simulation result(s), or which R file you want to run. In the dialog “R Scripts”, click the button “New”. In the “R Script Properties” dialog (automatically pops up), give this new connection a name or keep the default one. A recognizable name can help identify if you have several connections set up and want to choose specific ones at a later point.
Next in this dialog, browse the location of your R script file and click the “Browse” button to select your script. Then, select a run setting. For example:
- Choose “End of Run” if simulation results should be exported to R at the end of a run
- “End of Trial” if it should be done at the end of the trial
- “None” if you do not wish to set up an automatic connection for now or you want to set this up through Visual Logic (see next section).
Lastly, choose the internal spreadsheet where the simulation results used by R are located. This is a standard internal spreadsheet as a lot of Simul8 users have used it before. When you want to produce in-built Box Plots of selected KPIs from trial runs, leave this box unticked.

Export data to R and run the R Script from Simul8
With the connection from Simul8 to R set up, you can now choose between various ways for exporting the data and run your R script.
The first option is to do this automatically which you have already set up in the previous step. That is, when you choose “End of Run” or “End of Trial” in the Script Properties menu (see previous section).
Note this option will create a CSV file within the location of your Simul8 model on end run/trial then run the script within the R connection. To use the data from the internal spreadsheet linked within the script please use your preferred R package and command to load in the CSV file for further analysis, as in the image below.

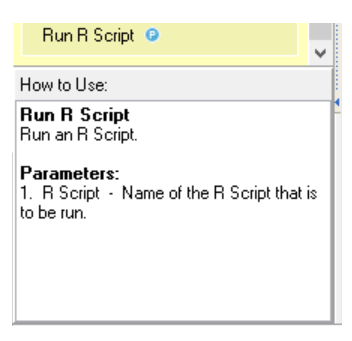
Another option is to run your R script using Visual Logic. The Visual Logic command shown in the below screenshot can be used for this. The only parameter needed is the name of the R script.
Lastly, you can run the R script by clicking the corresponding button in the R Script menu. Note, there you can also delete scripts that aren't needed anymore or amend their properties.
